Add AdMob Banner and Interstitial Ads in Android Studio
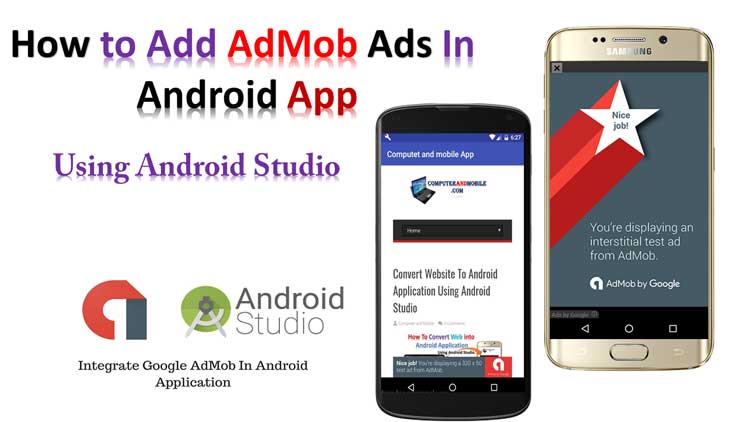
Today, we will learn how to Add AdMob Banner and Interstitial Ads in Android Studio. So, We will cover the implementation of Admob Banner and Interstitial Ads with Step-by-Step in Android Studio. You can generate more revenue with a proper AdMob Banner and Interstitial Ads in Android Studio by implementing banner and interstitial ads in Android Studio. This guide is perfect for beginners if you want to convert a website into your Android app to earn from AdMob ads. Then check out how to convert website into Android app in Android Studio.
What You’ll Need To Implement Banner and Interstitial Ads
- Android Studio is installed on your computer.
- An AdMob account (Sign up at AdMob website).
Step 1: Create AdMob Banner and Interstitial Ads Unit
- Log in to your AdMob account.
- Click on ‘Apps’ and then ‘Add App’.
- Follow the instructions to create a new app.
- Create ad units for Banner and Interstitial ads and note down the ad unit IDs.
Step 2: Setting Up Your Project in Android Studio
- Open your project in Android Studio to add AdMob Banner and Interstitial Ads.
- Add the following dependencies to your
build.gradle(Module: app) file:
dependencies {
  implementation 'com.google.android.gms:play-services-ads:22.5.0'
}
3. Add your AdMob Banner and Interstitial Ads app ID to the AndroidManifest.xml file below in <application> tag like this.
 <meta-data
        android:name="com.google.android.gms.ads.APPLICATION_ID"
        android:value="your admob app ID"/>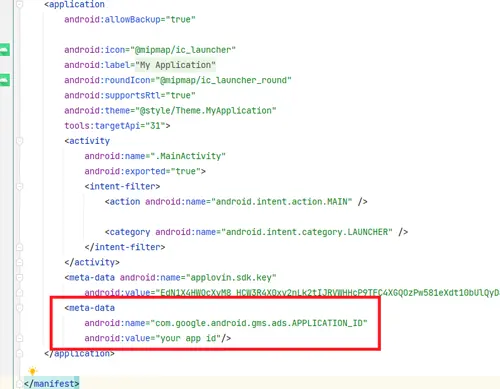
Step 3: Add NetWork Permissions in Manifest File
We need some necessary permission to request admob ads to load and show. Add the following permissions in your app Manifest file to run Admob Banner and Interstitial ads.
 <uses-permission android:name="android.permission.INTERNET" />
 <uses-permission android:name="android.permission.ACCESS_NETWORK_STATE" />
 <uses-permission android:name="android.permission.ACCESS_WIFI_STATE" />
Step 4: Add Admob Banner Ad in the Android Studio
To implement an admob banner ad, we need two steps.
- Banner AdView to the Main_Activity.XML Layout File
- MainActivity Programming To Show Admob Banner Ad
Step 1: Banner AdView to the Main_Activity.XML
Most beginners make big mistakes in adding the Banner AdView to the XML layout file. They added a Banner AdView without a proper place. As a result, the AdMob banner ad covers the app content. Then, they face a low match rate issue. So, We will place our Admob Banner ad below the other content by adding the android:layout_below=”@+id/w” and android:layout_marginTop=”6dp”. Like this, AdView is shown below of the TextView. Don’t forget to change your ads:adUnitId=”ca-app-pub-3940256099942544/6300978111″ when you want to publish your app to the Play Store.
 <RelativeLayout
        android:layout_width="match_parent"
        android:layout_height="wrap_content">


        <TextView
            android:id="@+id/w"
            android:layout_width="match_parent"
            android:layout_height="wrap_content"
            android:layout_margin="30dp"
            android:text="SHOW AD"
            >

        </TextView>

<com.google.android.gms.ads.AdView
    xmlns:ads="http://schemas.android.com/apk/res-auto"
    android:id="@+id/adView"
    android:layout_below="@+id/w"
   android:layout_marginTop="6dp"
   android:layout_width="wrap_content"
    android:layout_height="wrap_content"
    android:layout_centerHorizontal="true"
    android:layout_alignParentBottom="true"
    ads:adSize="BANNER"
    ads:adUnitId="ca-app-pub-3940256099942544/6300978111">
</com.google.android.gms.ads.AdView>

    </RelativeLayout>
Step 2: MainActivity Programming To Show Admob Banner Ad
Now, we have a few programs to show our admob banner ad in our app using Android Studio.
1. Define the AdView object in your MainActivity by adding the following code
private AdView mAdView;
2. Initialize the Mobile Ads SDK in your MainActivity onCreate method by adding the following code.
MobileAds.initialize(this, new OnInitializationCompleteListener() {
            @Override
            public void onInitializationComplete(InitializationStatus initializationStatus) {
            }
        });
3. Load the Admob Banner Ad in onCreate by adding the following code.
        mAdView = findViewById(R.id.adView);
        AdRequest adRequest = new AdRequest.Builder().build();
        mAdView.loadAd(adRequest);
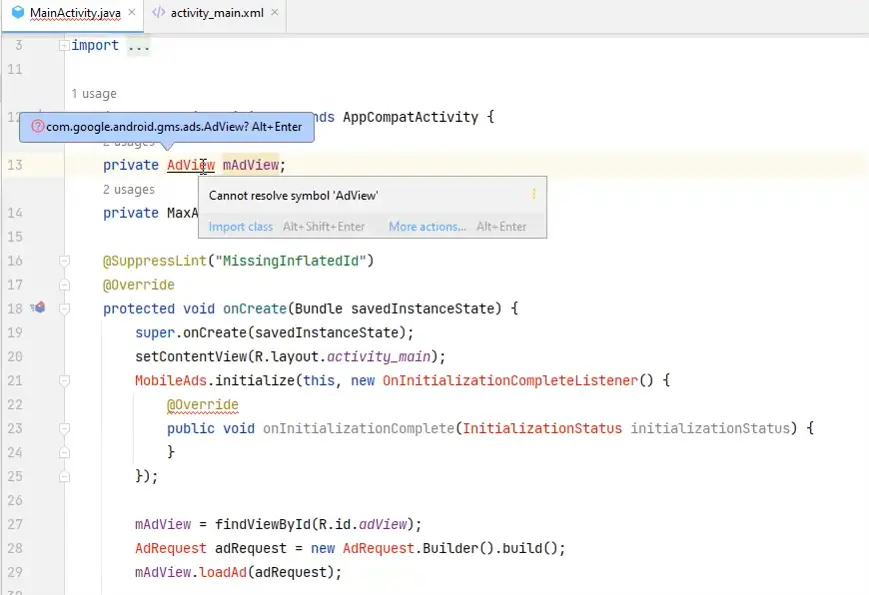
4. Import Method Class in your MainActivity using the Alt + Enter key. All Red error needs to import method class by importing. As shown in the screenshot below.
Add AdMob Interstitial Ads in Android Studio
Amob Interstitial ad implementation needs such simple steps.
- Define the InterstitialAd object in your MainActivity.java by adding the following code.
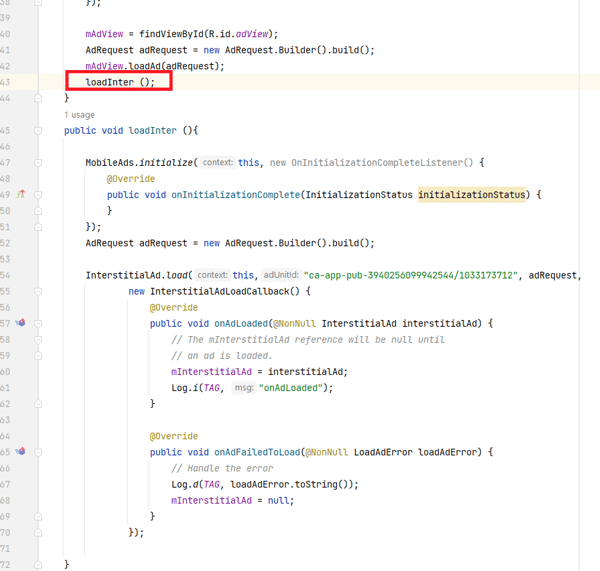
private InterstitialAd mInterstitialAd;2. Prepare InterstitialAd code by adding the following code to the bottom of the OnCreate method
public void loadInter (){

        MobileAds.initialize(this, new OnInitializationCompleteListener() {
            @Override
            public void onInitializationComplete(InitializationStatus initializationStatus) {
            }
        });
        AdRequest adRequest = new AdRequest.Builder().build();

        InterstitialAd.load(this,"ca-app-pub-3940256099942544/1033173712", adRequest,
                new InterstitialAdLoadCallback() {
                    @Override
                    public void onAdLoaded(@NonNull InterstitialAd interstitialAd) {
                        // The mInterstitialAd reference will be null until
                        // an ad is loaded.
                        mInterstitialAd = interstitialAd;
                        Log.i(TAG, "onAdLoaded");
                    }

                    @Override
                    public void onAdFailedToLoad(@NonNull LoadAdError loadAdError) {
                        // Handle the error
                        Log.d(TAG, loadAdError.toString());
                        mInterstitialAd = null;
                    }
                });

    }
3. Import Method Class in your MainActivity using the Alt + Enter key. All Red error needs to import method class by importing like a banner ad.
4. Load the Interstitial Ad in onCreate the method by using the following code
loadInter ();5. Show the Interstitial Ad in your Android app. You need to show an Interstitial Ad when a user presses any button to do something; if you show an Interstitial Ad directly on loading activity, there is an Admob Policy Violation. So we have a button to open new activity, and we will show an interstitial ad using this button code given below
Only Interstitial Ads show code
if (mInterstitialAd != null) {
  mInterstitialAd.show(MyActivity.this);
} else {

}
Interstitial Ad code when the ad is dismissed
 mInterstitialAd.setFullScreenContentCallback(new FullScreenContentCallback(){
                        @Override
                        public void onAdDismissedFullScreenContent() {
                            mInterstitialAd = null;

                        }
                        @Override
                        public void onAdFailedToShowFullScreenContent(AdError adError) {
                            mInterstitialAd = null;
                        }
                    });
A complete code to show an Interstitial Ad, and after closing the ad, the user moves to another activity.
 button.setOnClickListener(new View.OnClickListener() {
            @Override
            public void onClick(View v) {
                if (mInterstitialAd != null) {
                    mInterstitialAd.show(MainActivity.this);
                    mInterstitialAd.setFullScreenContentCallback(new FullScreenContentCallback(){
                        @Override
                        public void onAdDismissedFullScreenContent() {
                            mInterstitialAd = null;
                            Intent intent = new Intent(MainActivity.this, Chat.class);
                            startActivity(intent);// after closing ad new activity starts
                            loadInter (); // if you load again after close ad
                        }
                        @Override
                        public void onAdFailedToShowFullScreenContent(AdError adError) {
                            mInterstitialAd = null;
                        }
                    });

                } else {
                    // if ad not load then start new activity
                    Intent intent = new Intent(MainActivity.this, Chat.class);
                    startActivity(intent);
                }


            }
        });

    }
In Conclusion:
Following our guidelines, I hope you will successfully add AdMob to your Android app. If you have any problems, please share them with us. We will try to reply to your comment within two business days.

